Monday, January 14, 2019

How To Add a Facebook Like Button to Blogger Posts


And a quick follow up to the previous post (Adding Facebook Like to Website)

How To Add A Facebook Like Button to Blogger Posts

Edit blogger template and paste the following after the last "<data:post.body/>"

<!-- Like Button -->
<br/><br/><iframe allowTransparency='true' expr:src='&quot;http://www.facebook.com/plugins/like.php?href=&quot; + data:post.canonicalUrl + &quot;&amp;layout=button_count&amp;show_faces=false&amp;width=100&amp;action=like&amp;font=arial&amp;colorscheme=light&quot;' frameborder='0' scrolling='no' style='border:none; overflow:hidden; width:100px; height:21px;'/>
<!-- Like Button -->


Adding Facebook Like to Website


Real quick tutorial on how to add a Facebook like to your site.

1. Go to https://developers.facebook.com/docs/plugins/like-button

2. Enter your site's URL to Like

3. Click "Get Code"

4. Edit your sites HTML and add the "Step 1" box of code to just below your <body> tag.  For Blogger, this would be "Edit Template".

5. Add the "Step 3" box of code in the place you wish to put the like button.  For Blogger, this would be add an HTML/Javascript Widget.


Saturday, June 23, 2018

Monday, June 4, 2018

Microsoft Buys GitHub


Microsoft Buys GitHub for $7.5 Billion


GitHub is a development platform inspired by the way you work. From open source to business, you can host and review code, manage projects, and build software alongside millions of other developers.


Wednesday, November 22, 2017

Proxy serial over TCP with socat

I recently needed to talk to a serial port from a remote system.  I found a Linux tool called socat - Multipurpose relay (SOcket CAT) that worked perfectly.  The target was a Raspberry Pi with a connected serial device.

To install socat on the Raspberry Pi, and the friend Ubuntu system:

sudo apt-get udpate
sudo apt-get install socat

On the Raspberry Pi I started the socat server with:

# socat tcp-listen:8000,reuseaddr,fork file:/dev/ttyUSB0,nonblock,waitlock=/var/run/tty0.lock,b115200,raw,echo=0

This will connect to the serial port, and stay connected after disconnected clients.

On the Ubuntu friend system I started the socat client with:

socat pty,link=/dev/ttyUSB0,waitslave tcp:pi.oeey.com:8000

After each disconnect the socat client will disconnect as well.  To keep it running, throw it in a loop:

# while true ; do socat pty,link=/dev/ttyUSB0,waitslave tcp:pi.oeey.com:8000 ; sleep .001 ; done

I then used tio (or minicom) to talk to the remote serial port:

# tio -b 115200 /dev/ttyUSB0
[tio 16:53:30] tio v1.20
[tio 16:53:30] Press ctrl-t q to quit
[tio 16:53:30] Connected

> I sent something to the serial port


minicom - friendly serial communication program


minicom

minicom - is a menu driven communications program. It emulates ANSI and VT102 terminals. It has a dialing directory and auto zmodem download.

Installation


# on RedHat based:
yum install minicom

# on Debian based:
sudo apt-get install minicom

Special Keys


# Menu
CTRL-A Z

# To Quit
CTRL-A Q

# To send (via xmodem/ymodem/zmodem)
CTRL-A S

# To receive (via xmodem/ymodem/zmodem)
CTRL-A R

# To configure
CTRL-A O

Command Line


# Bring up minicom configuration
minicom -s

# Connect to ttyUSB0 with 115200 baud rate
minicom -b 115200 -D /dev/ttyUSB0
The default configuration is 115200 8N1 with Hardware Flow Control. I usually disable Hardware Flow Control in my setting and save to the default 'df1'.

Tio


Although minicom describes itself as "friendly", it can be painful to setup and use.  As a suggestion, if you don't need send/receive abilities like xmodem, tio is much easier to use.

References


tio - A simple TTY terminal I/O application

Minicom is painful to use. I found a much easier tool to use called tio - A simple TTY terminal I/O application.

Usage


tio /dev/ttyUSB0
tio -b 115200 /dev/ttyUSB0  # 115200 is the default baud rate

Installing Tio


Using the release tar method:
mkdir ~/.src
cd ~/.src
wget https://github.com/tio/tio/releases/download/v1.20/tio-1.20.tar.xz
tar -avxf tio-1.20.tar.xz
cd tio-1.20/
./configure
make && make install

Using the source source method:
sudo apt-get install autoconf
mkdir ~/.src
cd ~/.src
git clone https://github.com/tio/tio.git
cd tio
sh autogen.sh
./configure
make && make install

Example Usage


# tio -b 115200 /dev/ttyUSB0
[tio 16:53:30] tio v1.20
[tio 16:53:30] Press ctrl-t q to quit
[tio 16:53:30] Connected

> some serial text

Exiting


To exit tio:
ctrl-t q


Other references


Thursday, March 30, 2017

Pi is a Palindrome


I know the last few digits of Pi...

Inside a mathematical singularity where infinity ends, where two parallel lines meet in Euclidean space, it turns out Pi is a Palindrome.  :-)


Full Comic


Tuesday, March 14, 2017

Pi Day


Happy Pi Day Everyone!  Today is 3.14, so eat plenty of pies.


3.14
15926535
8979323846
2643383279
5028841971
6939937510
5820974944
5923078164
0628620899
8628034825
3421170679


Saturday, March 11, 2017

Daylight Saving Time is Upon Us


Daylight Saving Time is upon us tonight - Sunday, March 12th, 2017 at 2am.  Don't forget to turn your "non-smart" clocks forward an hour.

I like to remind myself with, the following which helps me remember which direction to turn the clocks to.

"Spring" forward into action, and "Fall" back to sleep.


Friday, March 10, 2017

Why Fundamental Forces Are Difficult To Explain


Richard Feynman was asked Why Magnets Repel Each Other?  His answer sums up why it is so difficult to explain physics.  It requires accepting other answers as truth, or you rabbit hole down an endless path of why questions.  We take for granted that when your hand pushes against a chair it moves.  But your physical hand never actually touches the chair.  The electrical forces repel the chair at a minuscule level.  The magnetic force is very similar to the electrical forces.  The iron atoms of a magnet are all lined up so the magnetic forces are amplified to where they cross a greater distance.


Thursday, February 4, 2016

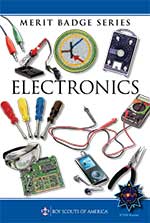
Electronics Merit Badge


Electronics is the science that controls the behavior of electrons so that some type of useful function is performed. Today, electronics is a fast-changing and exciting field.

Requirements

  1. Describe the safety precautions you must exercise when using, building, altering, or repairing electronic devices.
  2. Do the following:
    1. Draw a simple schematic diagram. It must show resistors, capacitors, and transistors or integrated circuits. Use the correct symbols. Label all parts.
    2. Tell the purpose of each part.
  3. Do the following:
    1. Show the right way to solder and desolder.
    2. Show how to avoid heat damage to electronic components.
    3. Tell about the function of a printed circuit board. Tell what precautions should be observed when soldering printed circuit boards.
  4. Discuss each of the following with your merit badge counselor, and then choose ONE of the following and build a circuit to show the techniques used:
    1. Tell how you can use electronics for a control purpose, and then build a control device circuit.
    2. Tell about the basic principles of digital techniques, and then build a digital circuit. Show how to change three decimal numbers into binary numbers and three binary numbers into decimal numbers.
    3. Tell about three audio applications of electronics, and then build an audio circuit.
Show how to read the schematic diagram of the project you chose and, to the best of your ability, explain to your counselor how the circuit you built operates.

  1. Do the following:
    1. Show how to solve a simple problem involving current, voltage, and resistance using Ohm’s law.
    2. Tell about the need for and the use of test equipment in electronics. Name three types of test equipment. Tell how they operate.
  2. Find out about three career opportunities in electronics that interest you. Discuss with and explain to your counselor what training and education are needed for each position.

Resources


Saturday, March 14, 2015

Happy Pi Day


Happy Pi day on 3 / 14 / 15 at 9 : 26 am 535897932... ns

Pi to 100 places:

3 . 141 592 653 589 793 238 462 643 383 279 502 884 197 169 399 375 105 820 974 944 592 307 816 406 286 208 998 628 034 825 342 117 067 9


Sunday, March 8, 2015

Arduino is a Guy


"Arduino will then stop talking about himself in the third person."

Apperently Arduino is a guy and illeistic too.


Friday, March 6, 2015

Electronics Merit Badge


This last Saturday I had the opportunity to volunteer to teach a few Boy Scouts the Electronics merit badge.


We had a good time talking about various electronics components, building and soldering an electronic kit.


The kit we put together was a noisy little police siren kit. Amazingly all of the boys were able to complete their kits without frying any transistors or IC chips.


We also got to play with a Metcal station which did a consistent and amazing job with the soldering tasks.


Electronics merit badge requirements

1. Describe the safety precautions you must exercise when using, building, altering, or repairing electronic devices.
2. Do the following:
a. Draw a simple schematic diagram. It must show resistors, capacitors, and transistors or integrated circuits, Use the correct symbols. Label all parts.
b. Tell the purpose of each part.
3. Do the following:
a. Show the right way to solder and desolder.
b. Show how to avoid heat damage to electronic components.
c. Tell about the function of a printed circuit board. Tell what precautions should be observed when soldering printed circuit boards.
4. Discuss each of the following with your merit badge counselor, and then choose ONE of the following and build a circuit to show the techniques used:
a. Tell how you can use electronics for a control purpose, and then build a control device circuit.
b. Tell about the basic principles of digital techniques, and then build a digital circuit. Show how to change three decimal numbers into binary numbers, and three binary numbers into decimal numbers.
c. Tell about three audio applications of electronics, and then build an audio circuit.
Show how to read the schematic diagram of the project you choose and, to the best of your ability, explain to your counselor how the circuit you built operates.
5. Do the following:
a. Show how to solve a simple problem involving current, voltage, and resistance using Ohm's law.
b. Tell about the need for and the use of test equipment in electronics. Name three types of test equipment. Tell how they operate.
6. Find out about three career opportunities in electronics that interest you. Discuss with and explain to your counselor what training and education are needed for each position. 
Source: Electronics - MeritBadgeDotOrg


Saturday, February 28, 2015

RadioShack Store Closures


Our local RadioShack closed, along with many other RadioShacks across the country in a massive Chapter 11 bankruptcy protection move.

Although RadioShack is significantly more expensive than buying parts online, they have saved my bacon more than once on various weekend electronic projects, when shipping time would have ruined my weekend.


References:


Sunday, February 8, 2015

Installing Ubuntu Server on Mac Xserve Server

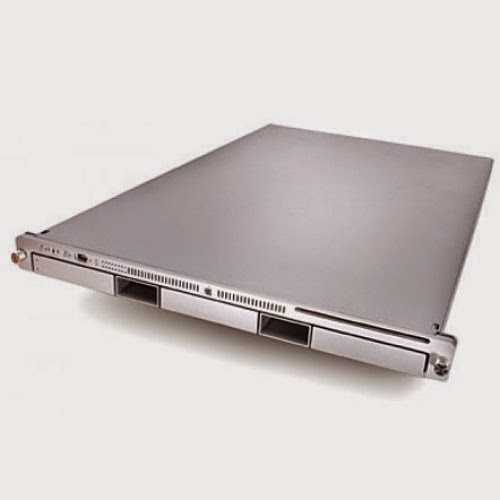
Apple Xserve Server

I had an old Xserve server laying around and wanted to put it to good use. My current Plex server is going away, so this will serve as the replacement. The Xserve line has long since been discontinued by apple and is no longer supported. What is the best solution to bring any old server back to life? Install Linux on it, of course!


Specs

Xserve3,1
Model: Intel Xserve3,1 (2009)
Processor: 2.26 GHz Quad-Core Intel Xeon
Memory: 12 GB 1066 MHz RAM
Network: 2x Intel 82574L Gigabit Network
Storage: (3 high speed SAS drives,
    but not important as controller is not supported)
Graphics: NVIDIA GeForce GT 120 with 256 MB of GDDR3 SDRAM
Expansion:
* 2x PCIe 2.0 ×16
* 3x USB 2.0
* 2x Firewire 800
* 1x RS-232 serial

additional details


Display Port


Unless you are a Apple enthusiast, you probably don't have a Mini DisplayPort adapter laying around. I picked up a Mini DisplayPort to DVI adapter on amazon for about $10.

Ubuntu Server ISO


For this particular installation, I have chosen to go with the latest Ubuntu Server LTS.


After downloading the Ubunut Server 14.04.1 LTS ISO (ubuntu-14.04.1-server-amd64.iso), I burned it to a CD-ROm with ImgBurn.

Install to USB Drive


One issue I ran into is I could not find a Linux driver for the Xserve RAID controller, so I ended up installing Linux onto a attached USB drive.  I had found articles online that talked about swapping out the back-plane with a standard SATA controller, but that is more effort than I wanted to put in for this project.


To keep the server from booting from the local hard drives, I pulled them slightly out.


The server only has USB 2.0 ports (could always install a USB 3.0 controller into one of the two free PCIe slots), but as USB 3.0 drives are pretty much all you can find now I used a USB 3.0 flash drive. I would recommend a SanDisk drive, but I am completely biased. :-)

Installing Ubuntu

To boot from the install CD, hold down the "Alt" key as the system boots.


You will see a white screen ("White Screen of WaitingTM"), and it won't seem like anything is happening for a long time (60+ seconds), but continue to hold down the alt key until the boot menu comes up.


Select the CD labeled "EFI Boot" (Xserver only supports UEFI supported installs), and the installer will continue to load.


After what seems like a really long time, an error will appear.  Ignore it and wait some more time, and the Ubuntu installer GRUB menu will appear.


Finally the "purple" Ubuntu installer will appear. The default options on the installer will be sufficient, but you can make any desired changes as well.


Luckily the Intel 82574L Gigabit Network is well supported by Linux.  The two connections are labeled on the back of the server.


Eventually you will be asked to choose a storage location for the install. If your USB drive has existing partitions, you will get a warning about unmounting partitions on /dev/sda, do so.


For the partitioning scheme, I am not a fan of LVM (had to many bad experiences trying to recover from issues), so I chose the "Guided - use entire disk" option.


Eventually the installation will complete, and the system will reboot.


Expect another 60 seconds of waiting at the "White Screen of Waiting", before the system actually boots and you get your expected login prompt.


Congratulations on completing the installation.


Saturday, February 7, 2015

The Zen of Python


The Zen of Python, by Tim Peters, is guiding principles for Python's design.

Beautiful is better than ugly.
Explicit is better than implicit.
Simple is better than complex.
Complex is better than complicated.
Flat is better than nested.
Sparse is better than dense.
Readability counts.
Special cases aren't special enough to break the rules.
Although practicality beats purity.
Errors should never pass silently.
Unless explicitly silenced.
In the face of ambiguity, refuse the temptation to guess.
There should be one-- and preferably only one --obvious way to do it.
Although that way may not be obvious at first unless you're Dutch.
Now is better than never.
Although never is often better than *right* now.
If the implementation is hard to explain, it's a bad idea.
If the implementation is easy to explain, it may be a good idea.
Namespaces are one honking great idea -- let's do more of those!

This list can also be generated within python by executing:
>>> import this